Updating Image Uploader on the Client Side
After updating Image Uploader on the server side it may require to update it on the client side. The present article describes how it can be done for both ActiveX and Java versions.
ActiveX
Internet Explorer stores all downloaded ActiveX controls in the Downloaded Program Files folder inside the Windows directory. Below you will find how to remove Image Uploader from cache of Internet Explorer 6 and 7.
To remove Image Uploader from Internet Explorer 6
- On the Tools menu of Internet Explorer, choose Internet Options.
Click Settings on the Temporary Internet Files box of the General tab (see the Figure 1.1):
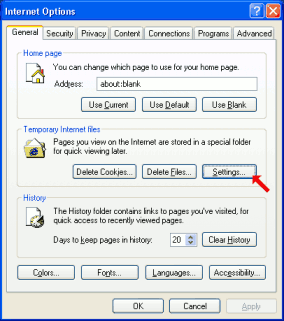
Figure 1.1. Step 1.Click View Objects (see the Figure 1.2):
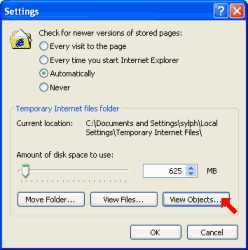
Figure 1.2. Step 2.Choose Image Uploader Control and delete it.
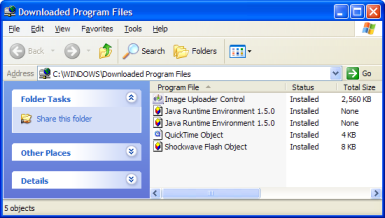
Figure 1.3. Step 3.To delete ActiveX control from this list
- Right-click an item and choose Remove.
- or -
Press DELETE key. - Click Yes button on the confirmation dialog.
- Right-click an item and choose Remove.
- Press F5 to refresh the page which contains the control. It will have Internet Explorer to update Image Uploader.
To remove Image Uploader from Internet Explorer 7 on Windows XP
- On the Tools menu of Internet Explorer, choose Internet Options.
Click Settings on the Browsing History box of the General tab (see the Figure 2.1):
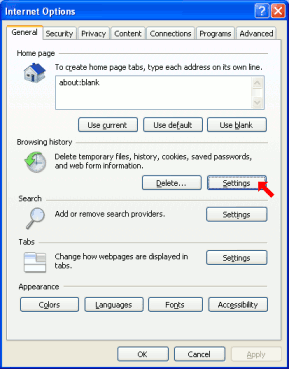
Figure 2.1. Step 1.Click View Objects (see the Figure 2.2):
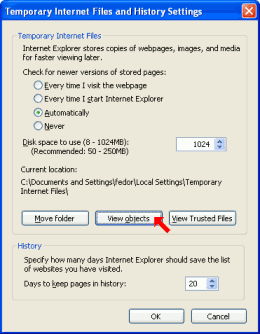
Figure 2.2. Step 2.Choose Image Uploader Control and delete it.
Figure 2.3. Step 3.To delete ActiveX control from this list
- Right-click an item and choose Remove.
- or -
Press DELETE button. - Click Yes button on the confirmation dialog.
- Right-click an item and choose Remove.
- Press F5 to refresh the page which contains the control. It will have Internet Explorer to update Image Uploader.
To remove Image Uploader from Internet Explorer 7 on Windows Vista
On the Tools menu of Internet Explorer, choose Internet Options.
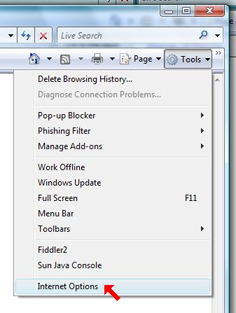
Figure 3.1. Step 1.Click Manage add-ons on the Manage add-ons box of the Programs tab (see the Figure 3.2):
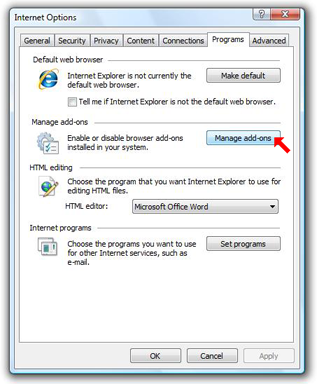
Figure 3.2. Step 2.Choose Downloaded ActiveX Controls from the Show drop-down box. Choose Image Uploader Control and delete it by pressing Delete button.
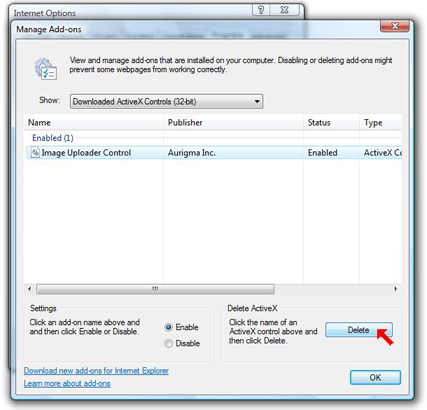
Figure 3.3. Step 3.- Press F5 to refresh the page which contains the control. It will have Internet Explorer to update Image Uploader.
To remove Image Uploader from Internet Explorer 8 on Windows Vista
-
On the Tools menu of Internet Explorer, choose Manage Add-ons.
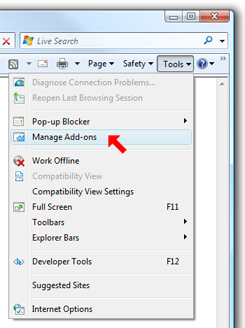
Figure 4.1. Step 1. -
Choose Downloaded Controls from the Show drop-down box. Then right-click Image Uploader Control and select More Information.
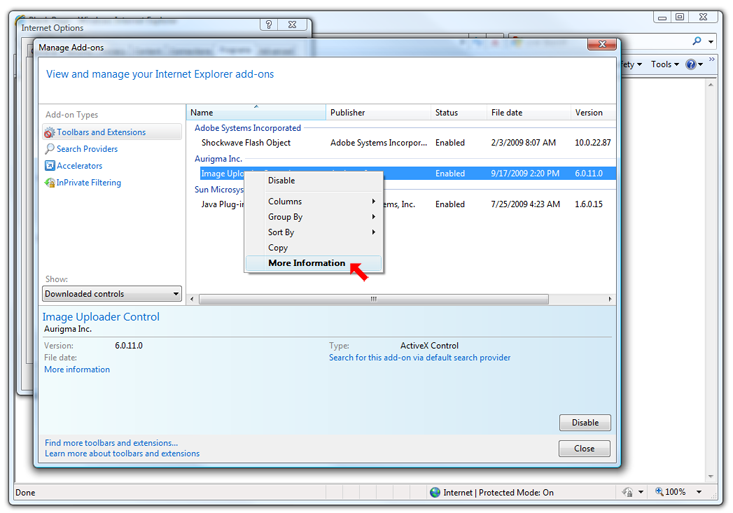
Figure 4.2. Step 2. -
On the More Information box click Remove.
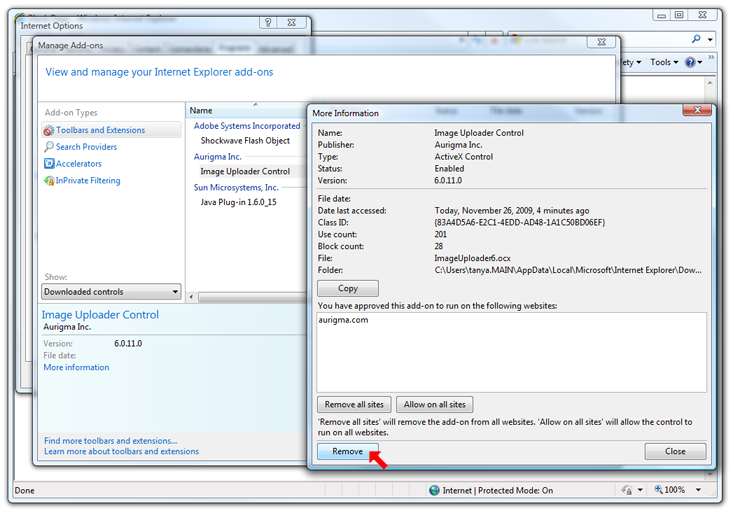
Figure 4.3. Step 3. - Press F5 to refresh the page which contains the control. It will have Internet Explorer to update Image Uploader.
It is highly recommended to close all the browsers which host Image Uploader. It is necessary to avoid a message prompting to restart computer. See the FAQ: Installation Problems topic for more details.
Another way to update ActiveX version of Image Uploader is to use standalone installer. In this case the user installs Image Uploader as a common application. Internet Explorer is not used to carry out the installation and, therefore, there are no problems with the browser cache.
Standalone installer can be downloaded at this location:
https://www.aurigma.com/downloads
To install it, just run this EXE file and follow the wizard steps.
You need to close all instances of Internet Explorer to make the update to come into effect.
Java
Java applets are stored in the cache that is accessible through the Java control panel. Follow these steps to do it:
Open Java Plug-in Control Panel. Depending on the platform, it can be found in different locations:
- Windows: Control Panel -> Java Plug-in
- Macintosh: Applications -> Utilities -> Java -> Java1.5 Plug-in Settings
- Linux: Preferences -> Java
- Click the Cache tab.
Click Clear to clear all cached applets. See the Figure 3.1 and Figure 3.2 below.
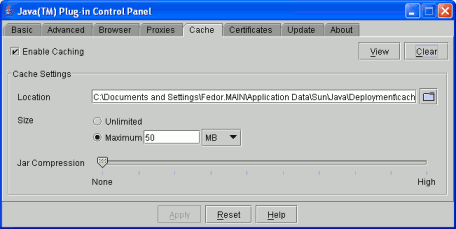
Figure 3.1. Clearing cache on Windows or Linux.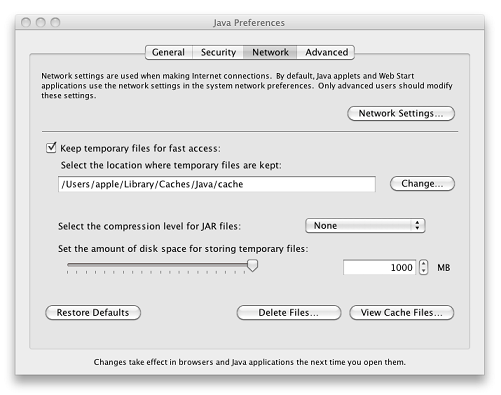
Figure 3.2. Clearing cache on Mac OS.