Using Precompiled Themes
Image Uploader Flash, as other Flash applications, allows changing its appearance
using a precompiled (*.swf) theme file. This file should contain CSS styles, images,
and fonts required for customizing the user interface. To compile CSS to SWF use
Flex SDK.
You should use the Flex version 4.1 to compile your themes.
As an example, you can use the SampleTheme.swf skin included in
Image Uploader Flash SDK. To change Image Uploader Flash
appearance to this theme just specify the flashControl.themeUrl
property with the path to this file.
var fu = $au.imageUploaderFlash({
    id: 'Uploader1',
    flashControl: {themeUrl: 'SampleTheme.swf'}
});
<aur:ImageUploaderFlash ID="Uploader1" runat="server">
    <FlashControl ThemeUrl="SampleTheme.swf" />
</aur:ImageUploaderFlash>
<?php
    $uploader = new ImageUploaderFlash("Uploader1");
    $uploader->getFlashControl()->setThemeUrl("SampleTheme.swf");
?>
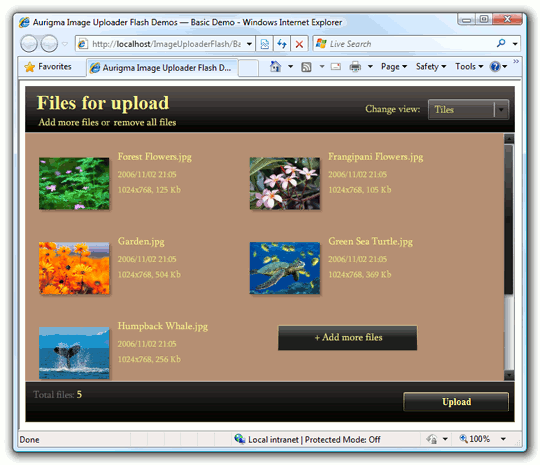
As the result, Image Uploader Flash will look like the following screenshot.
Customizing Image Uploader Flash Skin
You can use SampleTheme.swf as a base to create your own skin. To do this, find
SampleTheme.css in the
C:\Program Files\Aurigma\Image Uploader Flash 7.2.9\Themes\DarkSample\ folder, modify styles,
and then compile it to SWF using Flex SDK. The following steps demonstrate how it can be done.
- Download Flex SDK from the location above.
Modify styles in
SampleTheme.cssand add your images and fonts to theResourcesfolder. The classes in CSS file containing settings of user interface are self-documented, so it will be not so hard to understand settings of what element are stored in a particular class. As an example, we change font of the title, enlarge the Send button width, and change the List View background color. See snippets of theSampleTheme.cssfile below; modified lines are highlighted with italic.CSS/* Change font of the title */ .titleText { color: #fff991; font-size: 28; font-weight: bold; padding-left: 6; padding-top: 5; padding-bottom: -5; } /* Make the Upload button wider */ .sendButton { fill-alphas: 1.0, 1.0; fill-colors: #1f1f1f, #1f1f1f; border-color: #e3ce94; theme-color: #4f4f4f; font-family: EmbeddedThemeFont; font-size: 14; color: #fff991; text-roll-over-color: #fff991; width: 150; height: 27; } /* Change the Upload Panel background */ .tileList { internal-padding: 10; border-color: #dbdbdb; border-sides: "top bottom"; border-style: solid; border-thickness: 1; roll-over-alpha: 0.0; roll-over-border-color: #b68f72; background-color: #b68f72; selection-alpha: 1.0; selection-color: #6a635d; selection-border-color: #7f6629; selection-corner-radius: 2; background-disabled-color:#33302e; has-descr-icon: Embed("./Resources/HasDescription.png"); }-
Compile
SampleTheme.cssto SWF. To do this, use the mxmlc command-line utility located at thebinfolder of Flex SDK.mxmlc "C:\Program Files\Aurigma\Image Uploader Flash 7.2.9\Themes\DarkSample\SampleTheme.css"The
SampleTheme.swfappears in the folder were theSampleTheme.cssfile resides. - Move the
SampleTheme.swfto your web application. - Specify the path to this file as a value of the flashControl.themeUrl property. See code samples above.
-
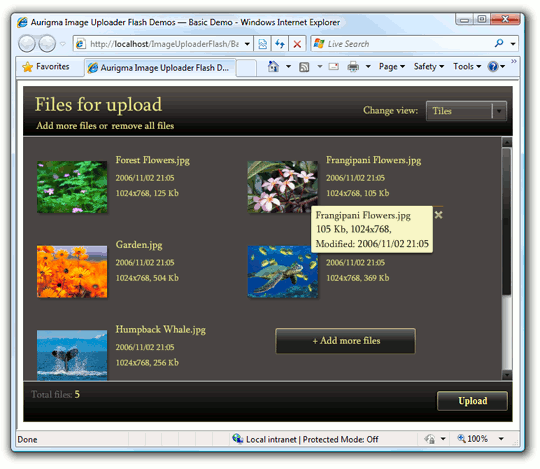
Run your application and make sure that Image Uploader Flash looks like the following screenshot.