User Interface Overview
This Photo Kiosk user interface overview contains the following sections:
- Welcome Screen
- Selecting Photos
- Specifying Order Details
- Editing Photos
- Additional Services
- Order Review
- Payment Confirmation
Welcome Screen
In the welcome screen user can select what to do next, for example:
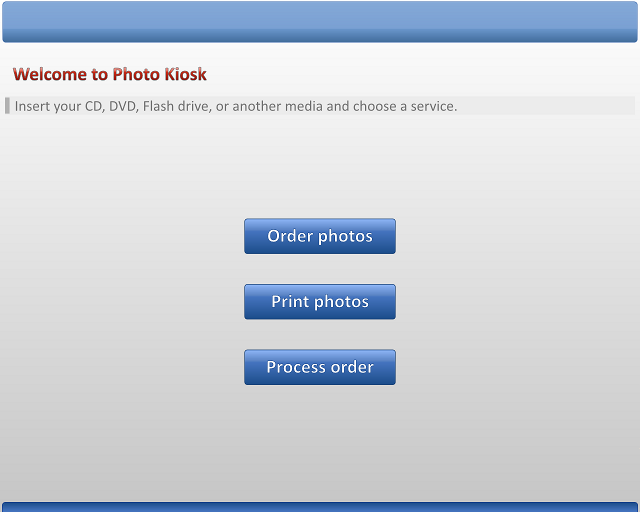
The Start button will only be displayed if one action is available for a user, for example, when kiosk works as a photo order station. You can show your banner at the welcome screen; for more information see the Customizing User Interface topic.
Selecting Photos
If Photo Kiosk found images in more than one folder, then a user can select folders to order photos from:
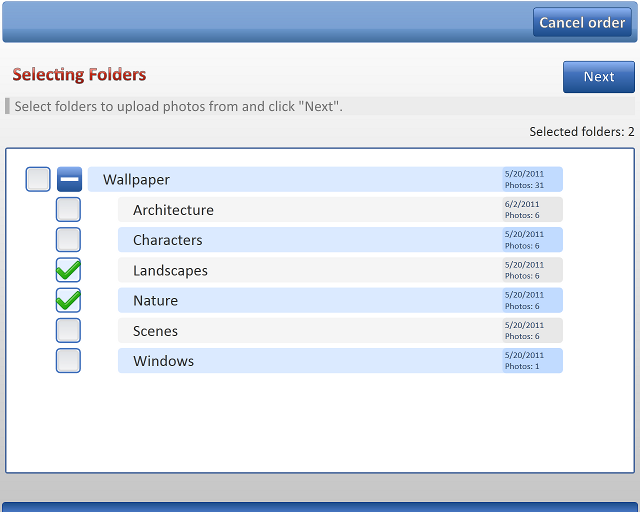
This screen can be disabled, then Photo Kiosk will display all found photos. For more information see the Configuring Digital Media topic.
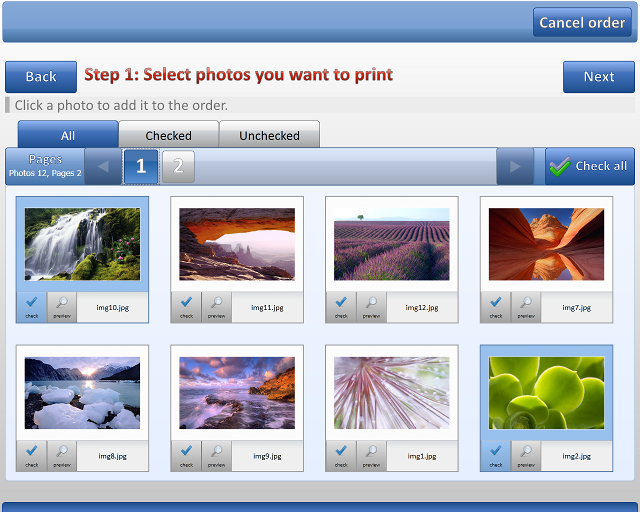
All photos from user-selected folders are displayed by eight per page. A user can open a page by tapping its number; to select a photo tap on its thumbnail. The magnifier icon allows seeing the photo full screen.
Specifying Order Details
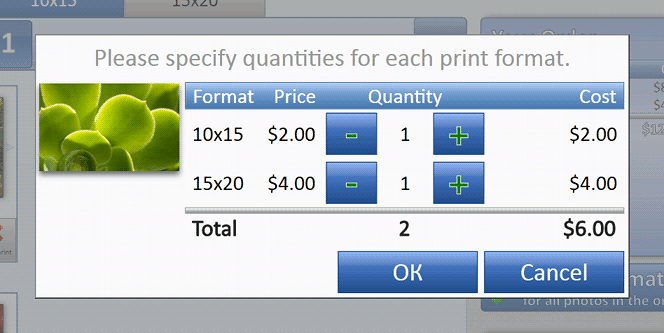
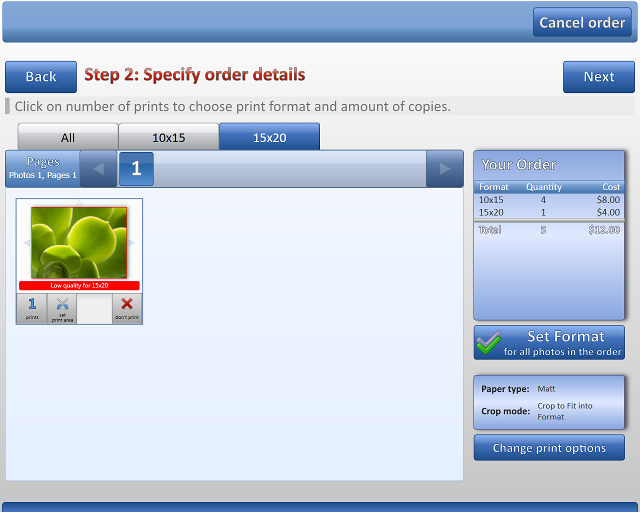
Here a user can specify prints format and quantity, set print area, and change paper type and crop mode.
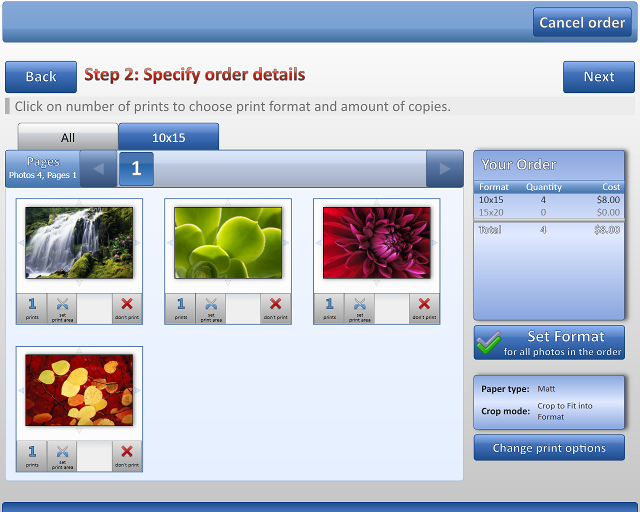
To change print format and quantity tap on the number of prints and the following dialog will appear:
If the chosen format is too large for the photo, the warning appears:
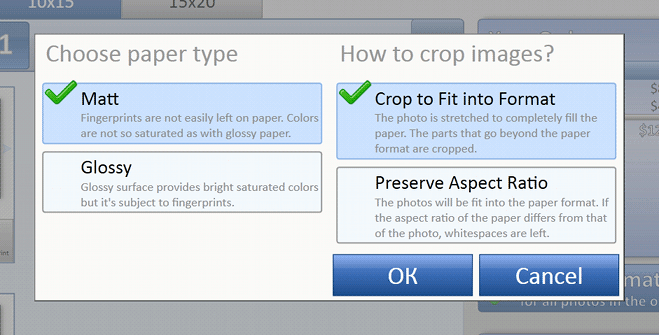
To change paper type and crop method tap the Change print options button and the following dialog will appear:
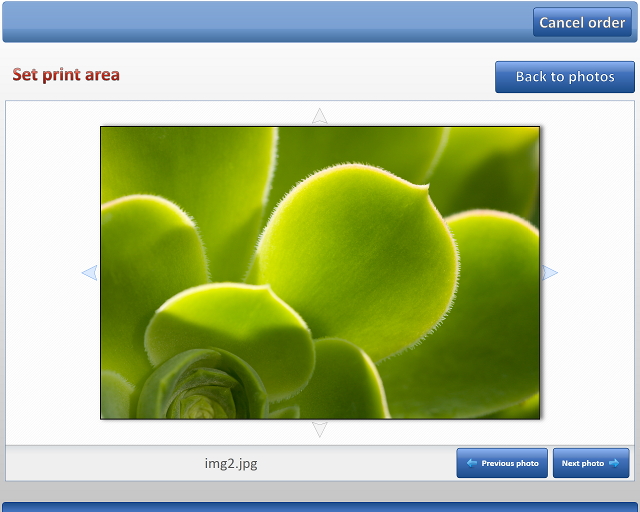
If the chosen crop mode is Crop to fit into format, then a user can select print area by dragging image thumbnail or tap on the scissors icon:
Editing Photos
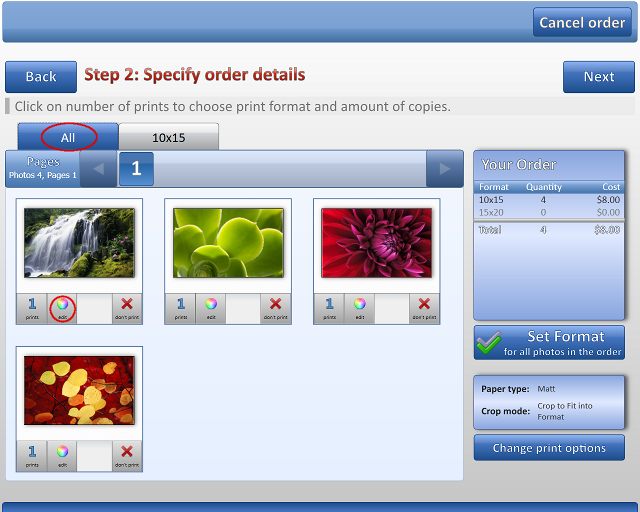
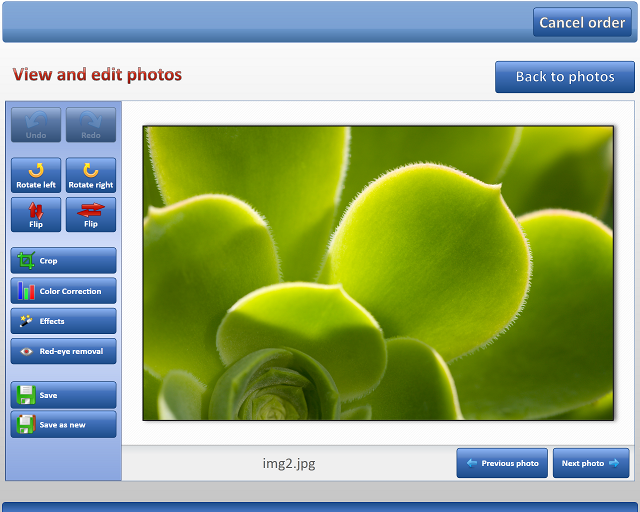
To edit a photo select the All tab and tap on the edit icon.
Here a user can edit photo in desired way. After the photo is edited, it can be saved or saved as new image; original photos will not be altered in any case.
Additional Services
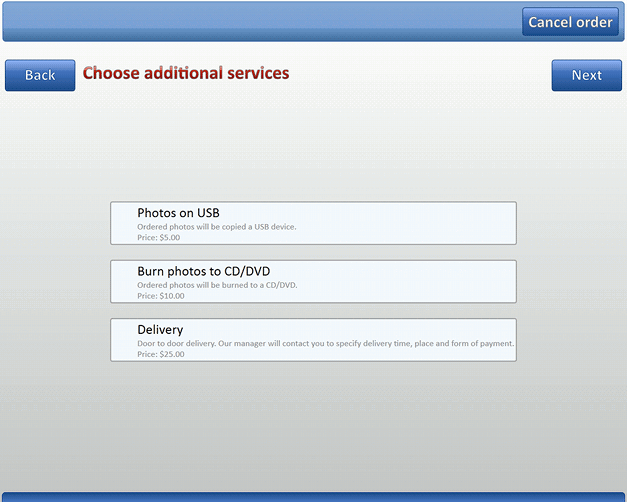
The next step after selecting photos is selecting additional services (if any). Here a user should tap on desired service to select it:
For more information see the Additional Services topic.
Order Review
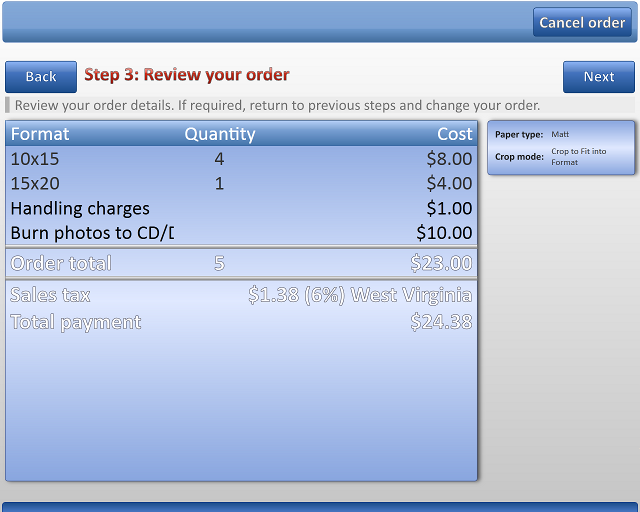
Here a user can review order and gets total payment including sales tax.
Payment Confirmation
If Photo Kiosk is configured as a instant print station, then the following screen will be available after selecting Process Order:
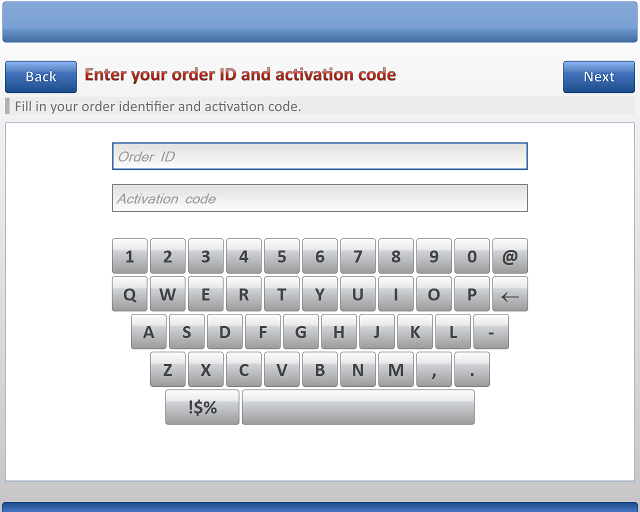
Here a user can enter order ID and payment confirmation code. If the code is valid, printing (or burning) process will be released. For more information about payment support in Photo Kiosk see the Confirming Payment topic.