Printing Receipts
If you use Photo Kiosk as a print order station, or an instant print station it is a good idea to print a receipt after the order is placed. Firstly, having receipt will speed up the payment process, because receipt contains order ID. Secondly, it can help to resolve issues. And, after all, you can use receipts as a marketing tool, for example, place ad on them. To print receipts you need to connect a receipt printer to the kiosk and to configure printing receipts in Photo Kiosk.
After you launch Configuration Tool and selected Receipt Printer from the tree on the left, the following settings will available:
| Name | Default Value | Description |
|---|---|---|
| Enabled | cleared | This check box specifies whether printing receipts feature is turned on. If Enabled is selected, Photo Kiosk will print a receipt containing order details on order completion. |
| Printer name | Use this list box to choose name of the printer used to print Photo Kiosk receipts. | |
| Receipt template | C:\Users\UserName\AppData\Roaming\Aurigma\ PhotoKiosk\7.0\ReceiptTemplate.xaml |
This setting specifies a XAML file with a receipt template. |
| Photos in receipt | 20 |
This setting specifies a maximum number of photos listed in the receipt. |
To start printing receipts you should select the Enabled check box and click receipt printer name in the Printer name list.
It is a good idea to test your receipt printing configuration after you have changed it. To print a test receipt, just click the Print test receipt button.
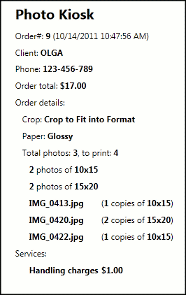
The standard receipt looks as follows:
If you want to update your template receipt, you should create the XAML file and specify its full path as Receipt template. Photo Kiosk distribution package includes a predefined template (ReceiptTemplate.xaml), which you can use as a base to create your own receipt template. Order details are inserted into the template via binding markup extensions ({Binding [property name]}). The properties in the template have self-descriptive names, so it should not be hard to understand what order details are provided with a particular property. The simplest way to create your own template is just remove TextBlock blocks containing order information you do not need to be printed. After you have created your own template, do not forget to specify its file name with the Receipt template setting.