Today I would like to dwell on very popular question asked by our customers. How to organize sending additional data along with files in Image Uploader. It can be very helpful if your website requires some metadata along with files like tags, name of a set to associate the file on server side, etc.
From our perspective we see this task consisting of 3 big portions: 1) displaying and associating data with files selected for upload in Image Uploader, 2) entering data by end-users, and 3) sending data along with files to server-side. Let's examine approaches to implementing each of them.
Displaying additional data in Image Uploader
Custom upload pane
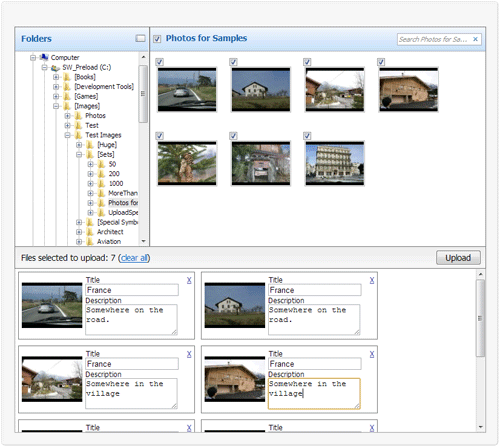
From the very early versions Image Uploader comes with a separate visual control called Thumbnail. The idea is quite simple. The control is designed to display thumbnail or icon for a specified file selected by a user for upload in "parent" Image Uploader. This way, you can hide upload pane in Image Uploader and create your own custom one using multiple Thumbnail controls in HTML layout. This approach is very flexible. You can create any HTML layout of upload pane you want. Additional data can be displayed next to files selected for upload as well as you can surround them with input fields allowing your clients to enter additional information. All you need to implement this approach is a good understanding of HTML and JavaScript. The product comes with ready to use sample application illustrating this method, it'd be a good starting point.

Additional data inside Image Uploader
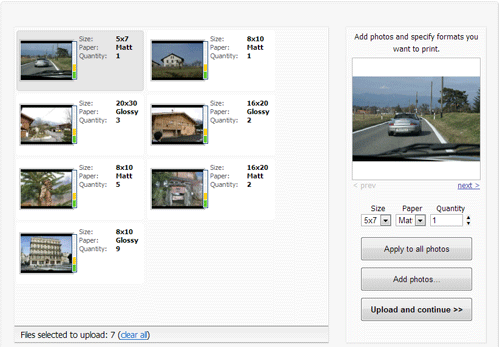
Version 7 introduced new way of displaying custom information inside Image Uploader. Now each file in Image Uploader can be accompanied with a custom text. It is formatted in HTML, set through API and rendered inside the control next to each file selected for upload. This way is much simpler than custom HTML pane and requires less coding. The approach is used in the Photo Order demo application available on our web site and redistributed with the product.

How End-users Populate Selected Files with Additional Data
It is not enough to display any data beneath or near selected files, it is very important to give end-users convenient way to fill in data during upload process. User interface layout will depend on which of two ways you implement in your application.
If you stick with custom HTML panel, layout can be anything you want since it is pure HTML and you can use any input fields available there.
If you decide to use the second approach, you have less variety in user interface. Since all data is rendered and displayed inside Image Uploader and it doesn't support input fields, you will have to organize input of data somewhere in HTML outside of the control. The workflow will be the same regardless of what information you are uploading: a client selects one or several items in upload pane, after that he/she switches to HTML panel and specifies values for selected files there. As soon as the input process is finished, the values are passed inside Image Uploader via JavaScript API, are associated with the selected files and Image Uploader displays the entered information next to them.
Sending Data to Server
The both approaches require a special JavaScript code doing the following. After end-user hits Upload button and prior to starting the upload process, your script should iterate through files selected for upload, and populate their tags with user specified values. It is up to you in what format to save multiple fields in this property; it can be XML or some other format. On server side you get a tag received with each file and extract values stored inside it.
Afterwords
That's the idea. I guess having documentation and two ready-to-use sample applications will help you to choose the way to implement sending additional data and will give you good starting point for implementation. If you have any questions, feel free to contact our support team, they will be glad to assist you with that.